Coffee
How to make pour over coffee: ratio, grind, bloom and pour

To make pour over coffee, use about 15 g of medium fine ground coffee for every 250 ml of water, with the water just off the boil at around 94°C. Wet the grounds with a little water and let them bloom for 30 to 45 seconds, then pour the rest slowly in circles so the whole brew finishes in three to four minutes. Below is each step in detail, what to change when a cup tastes wrong, and the kit that makes it easier.
What you need
Hot water runs through a bed of ground coffee in a filter and drips into a cup or server below. The kit is short:
- A dripper, the cone that holds the filter
- Filters, paper or a reusable steel mesh
- Freshly ground coffee
- A kettle, ideally one with a narrow spout
- Kitchen scales
- A mug, or a server if you are brewing for more than one
Scales make the biggest difference. A spoon is only a rough guide, and weighing coffee and water is the quickest way to make the same good cup twice. Stand the mug and dripper on the scales and weigh the water as you pour.
The ratio: how much coffee to water
A good starting point is 1:16, one gram of coffee to sixteen grams of water. A millilitre of water weighs a gram, so that is 15 g of coffee for a 250 ml mug, or 30 g for 500 ml, which is enough for two.
If the coffee tastes thin, use a little more, moving towards 1:15. If it tastes heavy, move towards 1:17. Change one thing at a time.
Grind size
For a cone dripper, grind to medium fine, roughly the texture of coarse sea salt. The grind controls how quickly the water passes through. Too fine and the brew takes too long and tastes bitter. Too coarse and the water rushes through, leaving a sour, weak cup.
Freshly ground beans taste noticeably better, because ground coffee loses its aroma within days. A burr grinder gives a more even grind than a blade grinder. If you buy ground coffee, ask for a filter grind and keep it in an airtight jar.
Water temperature
Water between about 92°C and 96°C draws out the flavour well without scorching it. You do not need a thermometer: boil the kettle, then leave it for about 30 seconds before you start pouring. Darker roasts are often better a little cooler, and light roasts a little hotter.
Much of the south and east of England has hard water, and there filtered water usually makes a cleaner, brighter cup.
Rinse the filter and warm the kit
Set a paper filter in the dripper and pour hot water through it before the coffee goes in. This rinses away any papery taste and warms the dripper and mug. Tip that water away, add the coffee and shake gently to level the bed.
The bloom
Start a timer and pour in about twice the weight of water as coffee, so 30 g of water for 15 g of coffee, just enough to wet all the grounds. Freshly roasted coffee holds carbon dioxide, and you will see the bed swell and bubble as the gas escapes. That is the bloom.
Wait 30 to 45 seconds. Letting the gas out first means the rest of the water reaches the coffee evenly instead of being pushed away by it.
How to pour
After the bloom, pour the rest of the water slowly in small circles, starting in the centre, working out towards the edge and back in again. Try not to pour straight onto the paper at the sides, because water that runs down the filter skips the coffee.
Pour in one slow, steady stream, or in two or three stages, topping up each time the level drops by a centimetre or so. A gooseneck kettle makes this easier, but a steady hand with an ordinary kettle works too.
Timing, and what to change
For one 250 ml cup, the whole brew, from the first pour to the last drip, should take three to four minutes. For two cups, allow four to five.
If the coffee tastes sour or thin and drains quickly, grind finer. If it tastes bitter or harsh and takes much longer than four minutes, grind coarser. If the time is right and it still tastes off, change the ratio instead.
When the flow slows to occasional drops, lift the dripper away. The last drops tend to be the most bitter.
Choosing a dripper
A cone with pleats or ribs on the inside leaves small channels between the filter and the wall, so the brew drains evenly.
The Toki pleated ceramic coffee dripper is a simple single cup cone. It is ceramic, 10.5 cm across the top and 7 cm high, with deep pleats all the way round and an opening in the base, small enough to sit straight on a mug. It comes in white, brown, black or a blue glaze that fades to white, and it is the dripper alone, so you will need filter papers.
If you usually brew for two, a set saves balancing a cone on a mug. The Iyo glass pour over coffee set pairs a ribbed glass cone dripper with a clear borosilicate glass server that holds around 600 ml, enough for two or three cups, with a wooden collar between the two. It takes standard cone paper filters for a two to four cup dripper. Our guide to borosilicate glass explains why it suits hot brewing.
Paper or a steel filter
Paper catches the finest particles and most of the coffee oils, giving a clean, bright cup. A stainless steel mesh filter lets more of the oils through, so the coffee has more body, with a little sediment at the bottom, and there are no papers to buy.
The Nirasaki glass pour over carafe works either way. It is an hourglass glass carafe with a reusable stainless steel mesh cone that sits in the neck, and a standard cone paper filter fits in its place when you want a cleaner cup. A bamboo collar tied with a leather cord gives you somewhere cool to hold it, and it comes in three sizes: 300 to 400 ml, 500 to 600 ml and 700 to 800 ml. Wash it by hand. With the mesh filter, grind a little coarser than you would for paper so fewer fine particles pass through.
A stand for the dripper
A stand holds the dripper above the cup, so you can brew into a taller mug or server. The Kamiyama pour over coffee stand is a walnut base of about 18 x 15.5 cm with a slim post and a ring about 7.5 cm across the inside. The ring slides from about 20 to 28 cm high and swivels aside when you are done. It suits cone drippers that are wider than the ring at the rim, not flat bottomed ones, and it is the stand only.
If you would rather not pour
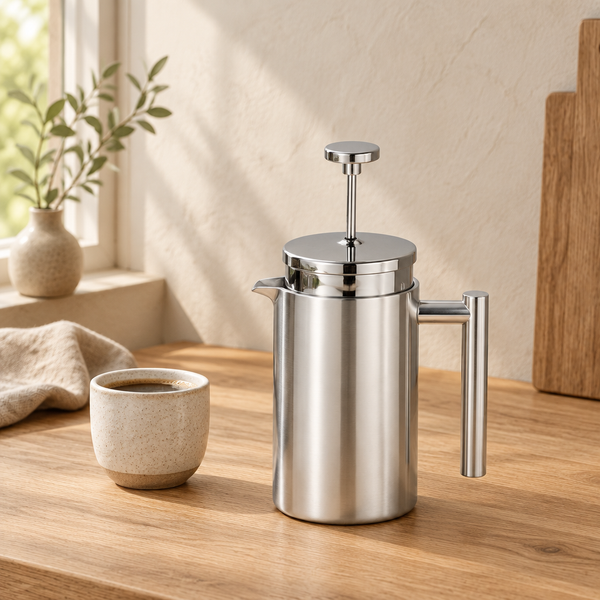
A cafetiere is the easy alternative, with no technique to learn. Use a coarse grind and about 60 g of coffee per litre, add water just off the boil, wait four minutes, then press slowly. The Tagajo double wall glass cafetiere is borosilicate glass with a second outer wall and a glass handle, plus a stainless steel lid, plunger and filter, in 350 ml, 650 ml or 1000 ml. If glass worries you in a busy kitchen, the Takahama steel cafetiere is double wall insulated stainless steel that keeps the pot warm on the table and goes in the dishwasher, in 350 ml, 800 ml or 1 litre.
A cafetiere gives a fuller, heavier cup, and pour over gives a lighter, clearer one where you taste more of the bean. You will find them all in kitchen and dining, and if tea is more your morning, see our guide to making matcha with a bamboo whisk.
Questions
What is the best ratio for pour over coffee?
Start at 1:16, which is 15 g of coffee to 250 ml of water. Use a little more coffee if it tastes thin and a little less if it tastes heavy, staying between about 1:15 and 1:17.
How hot should the water be for pour over coffee?
Around 92°C to 96°C. Boil the kettle and let it stand for about 30 seconds before you pour.
How long should pour over coffee take?
About three to four minutes for a single cup, including a bloom of 30 to 45 seconds. If it runs much faster, grind finer, and if it runs much slower, grind coarser.
Is pour over better than a cafetiere?
Neither is better. They simply taste different. Pour over through paper gives a clean, light cup, while a cafetiere gives a fuller one with more body and a little sediment.
The pieces in this guide
Everything named above, with the price on it. Free delivery, tracked to your door, and the delivery window stated before you pay.